Multi-page Elements: Displaying Content On All (Or Some) Pages
Multi-page Elements: Displaying Content On All (Or Some) Pages
ADDING AND MANAGING CONTENT
Adding Content to the Canvas
Element Index
Display Content Elements on All Pages
Copy / Paste
Moving All Content Up and Down
Naming Elements & Styles
< BACK TO OVERVIEW
The multi-page feature is an easy way to make a single element visible across multiple pages. Examples of elements that benefit from the multi-page feature include headers, footers, and side-panels.
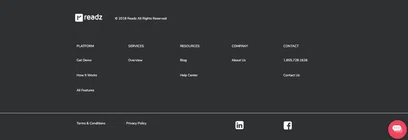
Anything that you want to be consistent across your pages or website. Below is a real example of how multi-page elements can be used. On the readz.com site, which was built with the Readz tool, the header and footer are identical for all pages.


So if you’re looking to reuse an element across pages, but require that the element be different on a specific page or pages, then you wouldn’t want to use the multi-page feature for this. Instead, you should copy and paste that element and make those changes per page.
Also, if your project contains only one page, the multi-page feature won’t be available to you.
1. Adding multi-page content
1. Click the '+' icon (add elements) on the left panel.
2. From the top list (strcuture) select the icon named "Multi-page element"
3. Hold down your mouse button while dragging the icon on to the canvas to the desired location
4. Edit: Add other elements in the multi-page element and/or style as desired.
2. Selecting pages to be displayed on
Once you have added a multi-page element to a page, the settings tab will open and you can choose which pages to select the element on.
The default value is to display on the current page only. You can select 'All Pages', or select specifically which pages you would like the multi-page content to display on.
3. Converting a 'regular' box into a multi-page
If you already have created some content which you now would like to have displayed on other pages, you can do this.
1. Select the element (usually a 'parent' element which you would like to see on multiple pages
2. Right-click while you have the mouse selected.
3. On the right-click menu, select 'Convert to multi-page'
4. Repeat the steps above to select which pages the element should be displayed on
4. Limitations: When you cannot use multi-page
1. When you only have a single page (not multiple)
2. When the targeted element or group is not 'top-level', i.e. it is contained in another group or box
3. 'Dots' elements cannot be multi-paged
4. The targeted element is already part of a multi-page group (eg as part of an action reference)
5. Autofill your footer with current, previous or next page names
The multi-page element shown above will look like this when viewing the selected page (preview or published):
Contact Support
STAY IN THE LOOP
Sign up for product updates
