Index
Index
ADDING AND MANAGING CONTENT
Adding Content to the Canvas
Element Index
Multi-page Elements
Copy / Paste
Moving All Content Up and Down
Naming Elements & Styles
< BACK TO OVERVIEW
The index panel in the Readz Design Studio gives you a handy and visual way to interact with every element on your page and to see the structure of your page visually.
In this article, we will give you an overview of how you can use the Index panel to:
1. Opening the Index panel

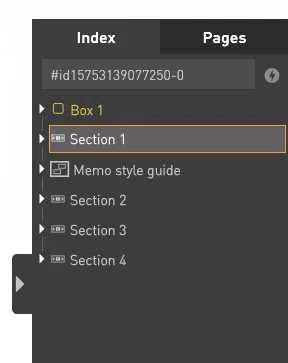
The Index panel is located on the right side of the Design Studio's screen. The Index panel opens automatically as soon as you select an element on the canvas. The 'Pages' panel will close, but is still available by selecting it in the top tab marked 'Pages'.
The element you selected is highlighted with a lighter color and an orange border.
Closing the Index panel
To close the Index panel, locate the 'right' arrow on the side of the Index panel.
2. See the structure and all elements on your page

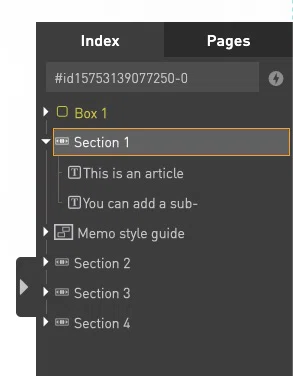
When an element contains other elements, this will be indicated by a triangle icon on the left side. When you click the triangle, the elements contained in the 'parent' element, the 'children' will be shown.
You can collapse the parent element again, by clicking on the triangle icon once more.
2.1. Listing order
All elements that are contained by a parent, are visualized (with the collapsing triangle) as children of that parent.
Within the canvas or their parent container, elements are sorted as follows:
- an element A is positioned above an element B on the canvas: element A will be listed above B in the Index
- an element A is positioned to the left of element B: element A will be listed above B in the Index
2.2. Selecting elements
When you select an element in the index, the element will be selected on the canvas, and the canvas will scroll to the selected element if it is not currently in view.
Selected elements are highlighted orange in the index.
You can select multiple elements from within the index, by holding down the Ctrl (Cmnd on Mac) key.
2.3. Moving elements using the Index
In the example above, element 'C' is moved in the index, and its position changes accordingly on the canvas.
2.4. Show or hide an element
When you hover over an element, an 'eye' icon will appear, indicating that this specific element is set to 'visible' on the canvas. By clicking the 'eye' icon, you will set the status of the element to 'hide.' You can unhide an element by clicking the icon again.
In the Index, all elements are shown, including the hidden ones. When an element is set to 'hide', it will not be visible on the canvas or on the published version.
TIP: 'Hide' only applies to the variant you are currently looking at. So you can have elements, e.g. images, that are visible on desktop and not on mobile. To do so, go to any mobile Viewport, select the element, and set its visibility status to 'hide'.
2.5. Naming or re-naming elements
You can name (or re-name) elements from within the Index. To do so, double-click the element in the Index. You can now edit the name of the element.
2.6. Multi-page elements
In the Index, a multi-page element is highlighted in gold.
3. Search the Index
To search the Index for an element, start typing what you are looking for in the search box. The results will appear below.
You can search the Index:
- by name of the element
- by type, e.g. by typing in 'Box'
4. 'Actions & Animations" in the Index
Clicking the Actions icon will open up the Actions menu.
4.1. The 'Actions' Index
To open the Actions Index, click the Lightning icon next to the search box. The actions menu will open.
To close the Actions Index, click the Index icon - which is in the same spot as the Lightning icon was.
Contact Support
STAY IN THE LOOP
Sign up for product updates
